Setup Guide
Note: Open a project folder/workspace first — Roopik features won’t activate until a workspace is loaded.
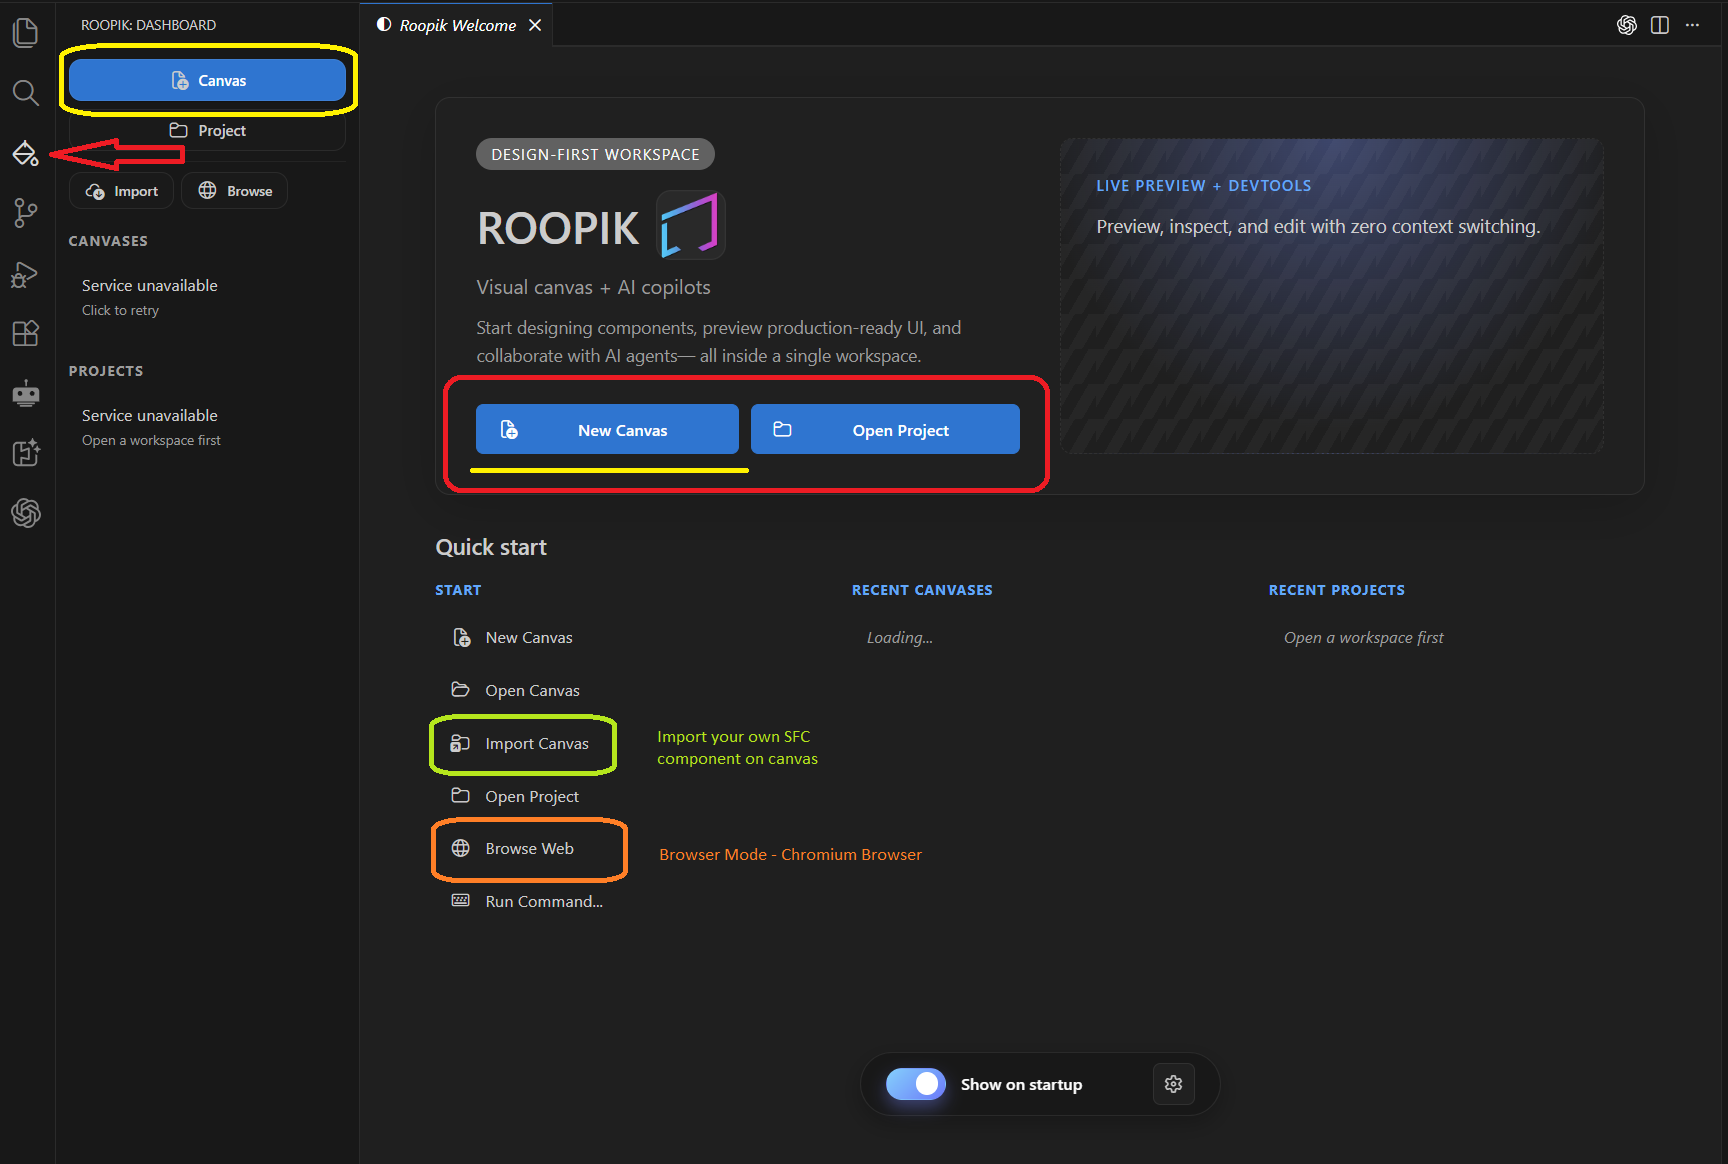
1) Open the Welcome screen
Open the Roopik activity bar icon on the left, or run the command palette (Ctrl + Shift + P) and type Roopik: Welcome. From here you can jump into Canvas Mode or Project Mode.
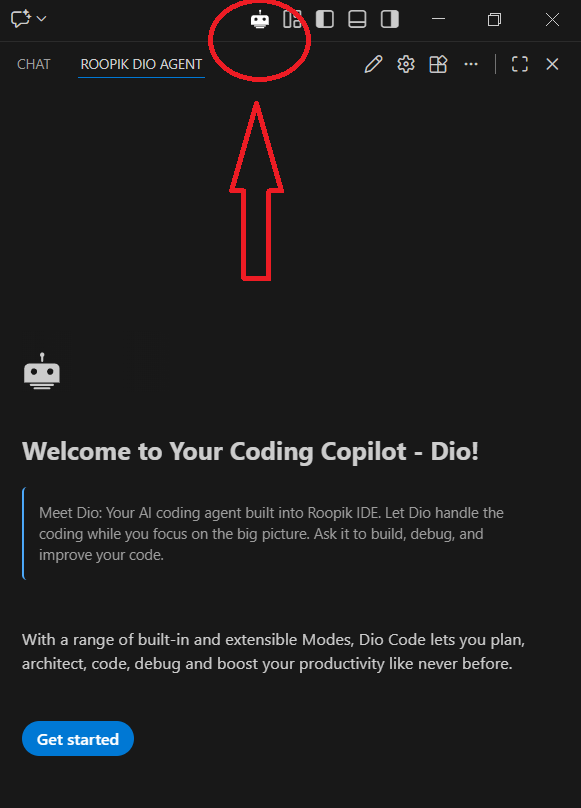
2) Open Dio Agent
Click the Dio robot icon in the top IDE menu, then click Get started to open the agent panel.
Note: If you are on an older version, choose Use without an account to connect your own third‑party providers.
3) Connect your AI provider
Choose 3rd‑party Provider to use your own API keys. Then open Settings → Providers, select a provider, paste your API key, choose a model, and save.

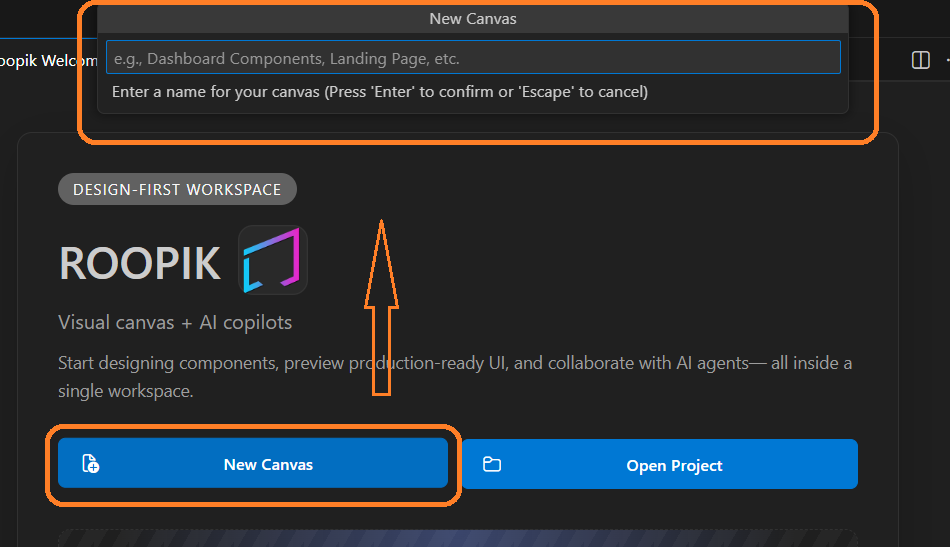
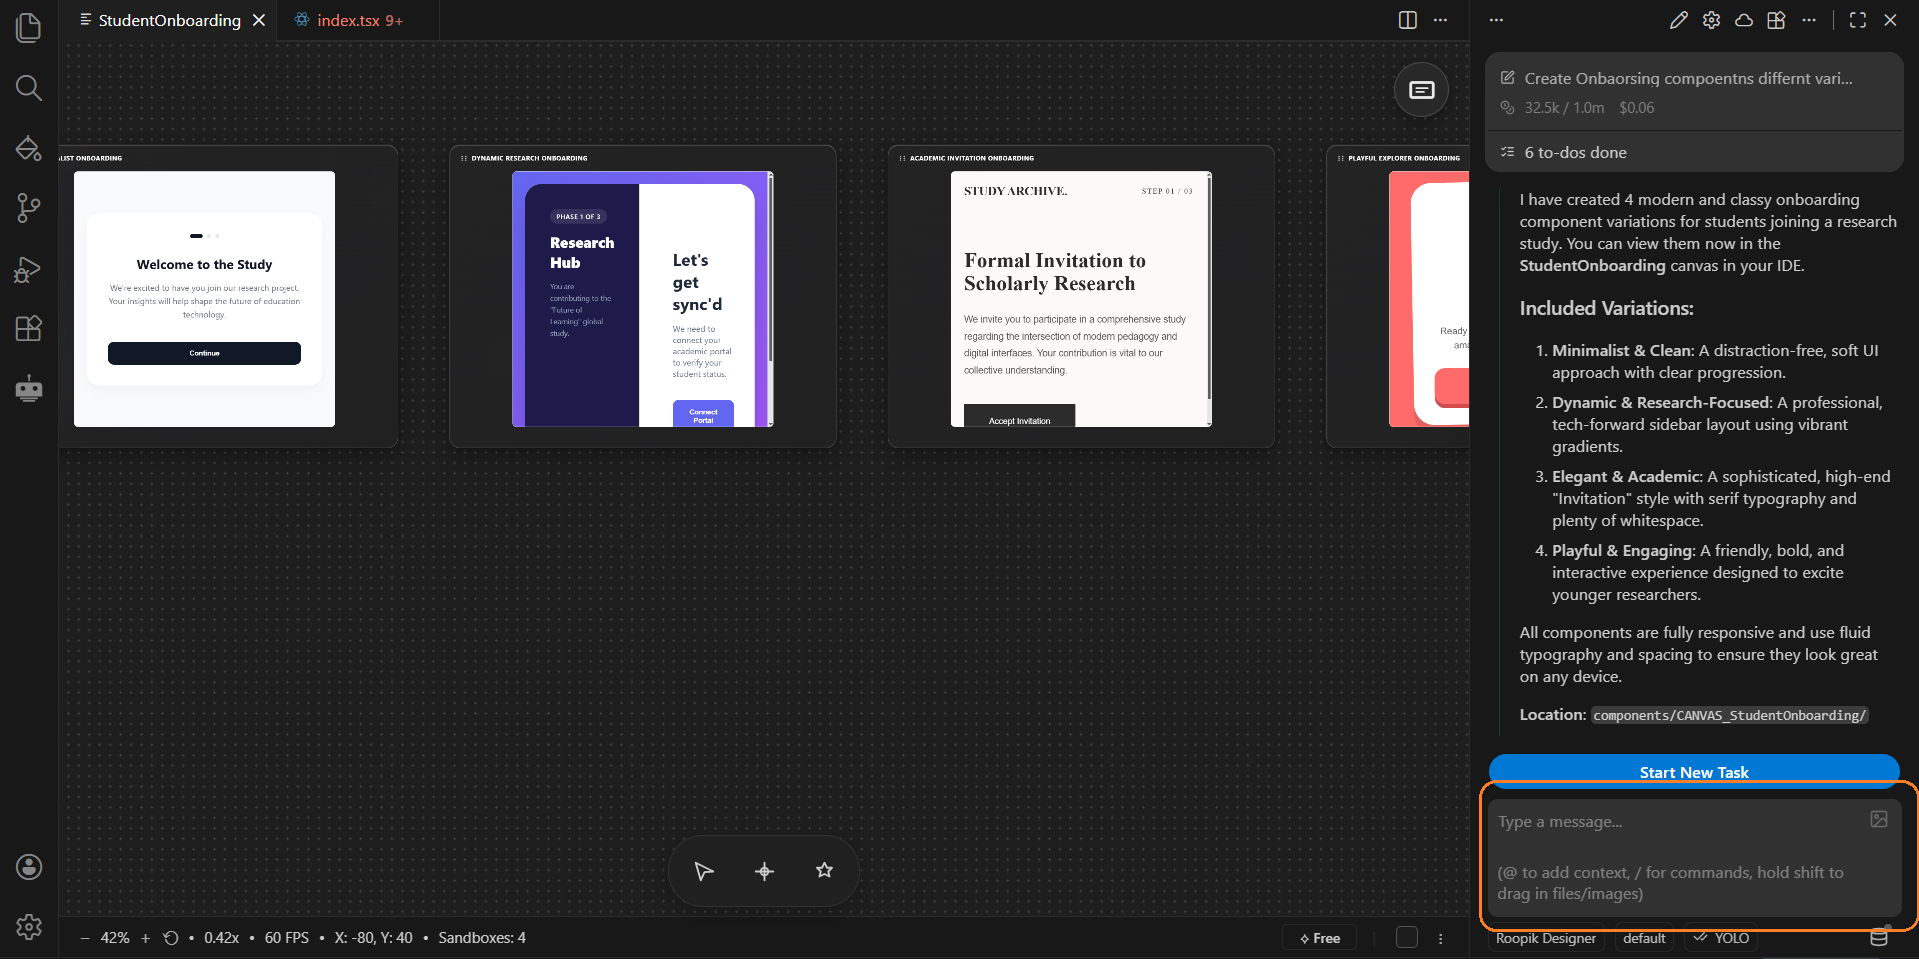
4) Create a new Canvas
Click New Canvas on the Welcome screen or use the Canvas entry in the left activity bar. Give your canvas a name, then ask Dio to build any component in the framework you want — it renders live on the canvas.
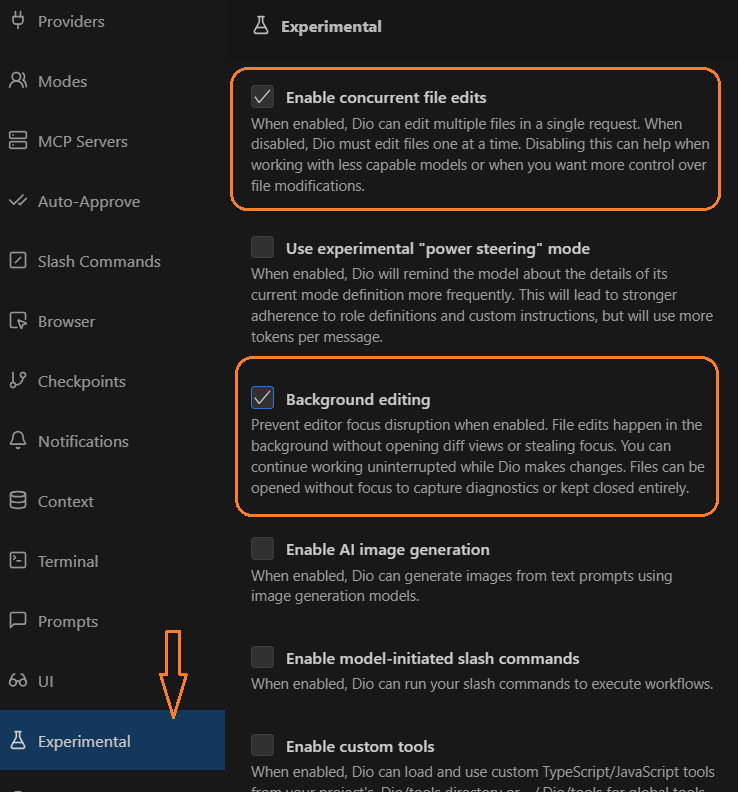
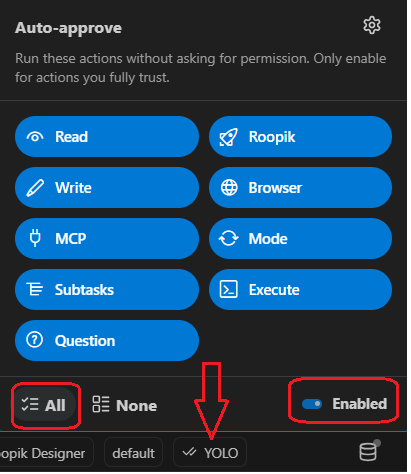
5) Tune settings for a smoother workflow
In Settings, enable Concurrent File Edit and Background Edit to allow parallel updates while you iterate. You can also set Auto Approve to All so Dio doesn’t ask for permission every time.
This guide is evolving. We will keep posting updates here with new Features.